By Miriam Maldonado, Community Health Promotion Specialist, Live Well San Diego Support Team
Microsoft PowerPoint is a vital tool for both school and work, offering a dynamic way to communicate ideas and organize information visually. Learning tips and tricks for PowerPoint can elevate presentations, making them more engaging and professional. Mastering its features helps students and professionals stand out!
Here are a few tips and tricks to help you work with Microsoft PowerPoint.
Aligning and Arranging Objects:
Ensures that objects on your slide are evenly spaced, aligned, and organized for a clean and professional look.
How-to:
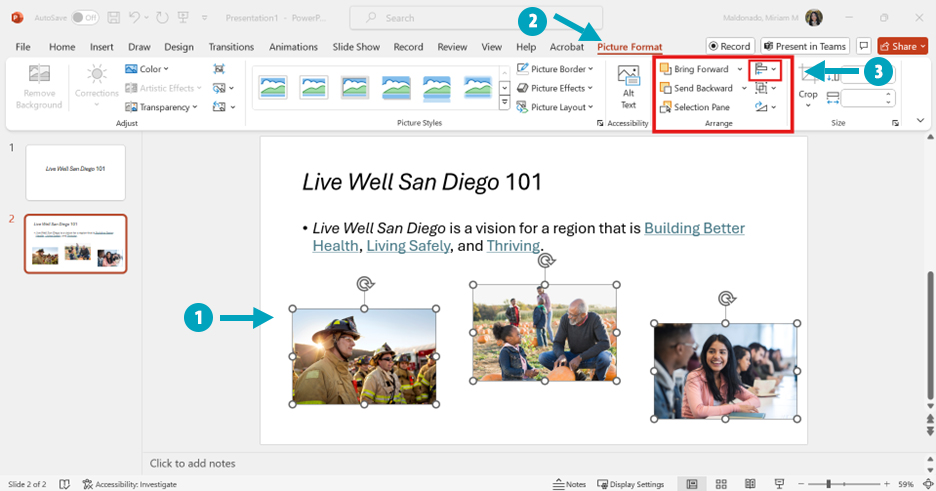
- Select the objects (text, shapes, images, etc.) you want to align by holding down Shift and clicking on each one.
- Select the “Picture Format” tab (or "Shape Format" if aligning objects).
- In the toolbar, go to “Arrange” and then choose “Align” from the dropdown menu.
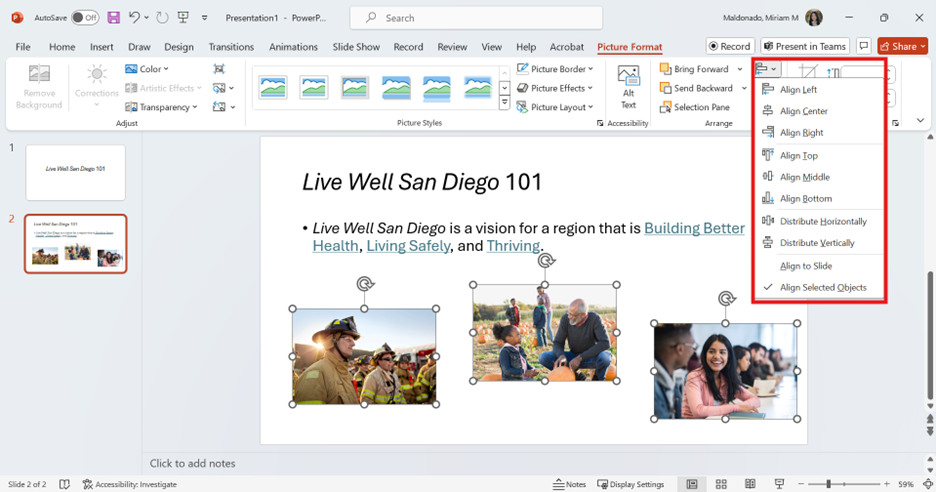
- Choose how you want to align your objects: Align Left, Center, Right, Top, Middle, or Bottom.
- To space objects evenly, click “Distribute Horizontally” or “Distribute Vertically” under the same Align menu.
Using the Designer Feature for Quick Layouts:
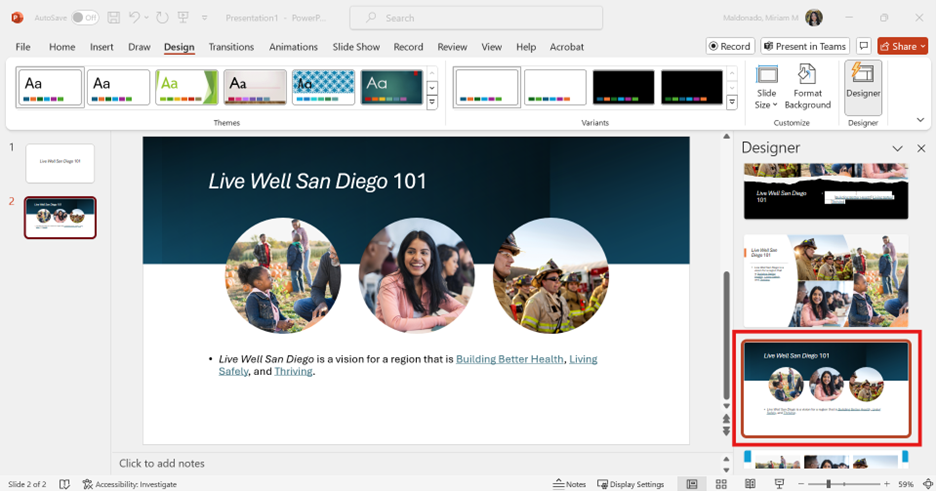
This tool automatically suggests layout and design ideas based on your content, helping you create visually appealing slides with ease.
- Open PowerPoint and create a new slide or open an existing one.
- Insert content like text, images, or charts on your slide.
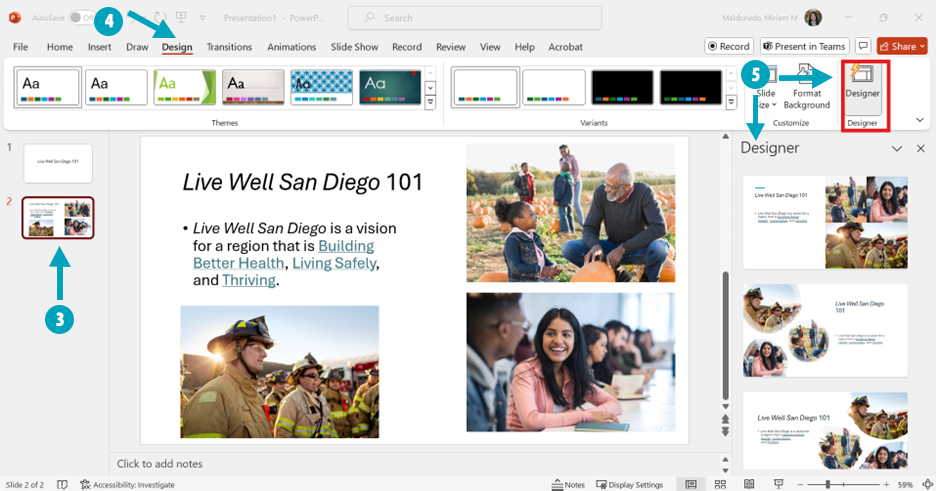
- Click on the slide you want to enhance.
- Go to the “Design” tab at the top of the PowerPoint window.
- On the right, click “Designer”. A panel will open with design suggestions.
- Scroll through the suggestions in the panel and choose the design that fits your content best by clicking on it.
- Your slide will automatically update with the chosen design!
Using Multiple Windows:
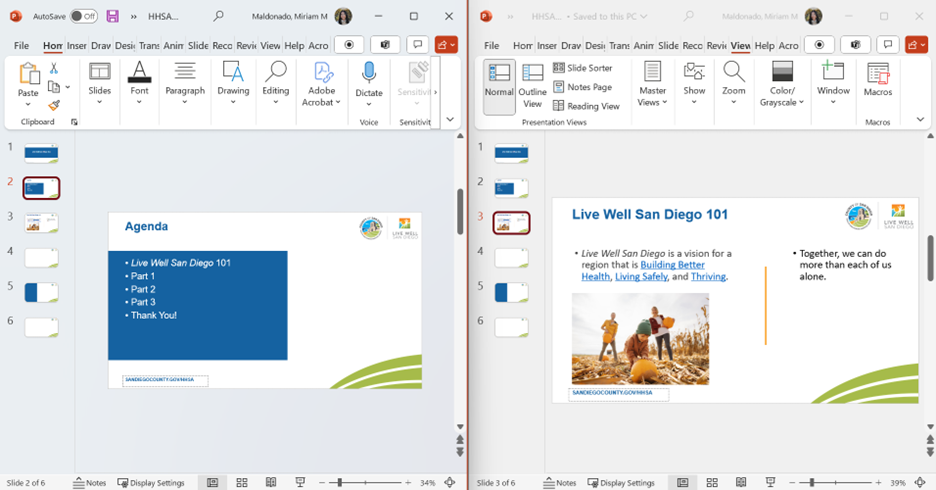
Allows you to open and work on the same presentation in separate windows, making it easier to compare slides or multitask.
- Open PowerPoint and have your presentation ready.
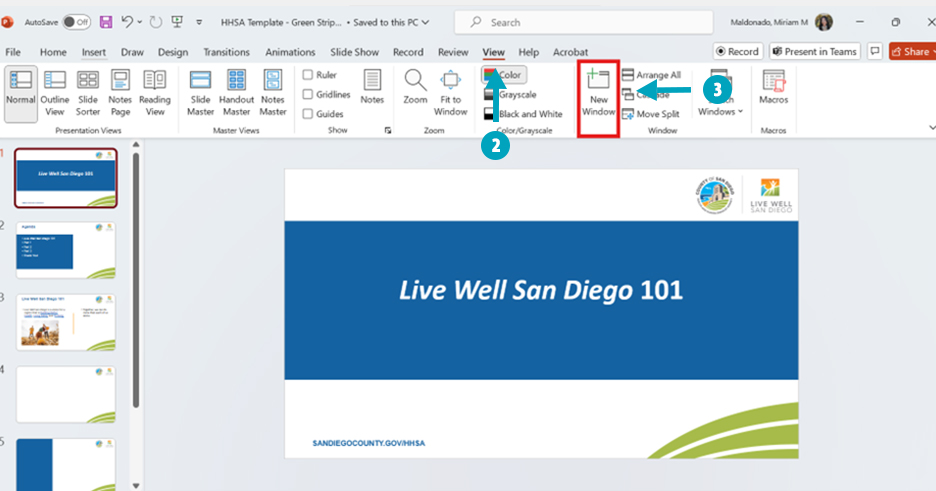
- Click on the “View” tab at the top of the PowerPoint window.
- In the “Window” section, click “New Window” to open the presentation in a second window.
- Arrange the windows side by side by clicking and dragging or use the Windows snap feature to compare or work on multiple sides at once.
Linking Excel Charts:
Allows real-time updates to your presentation whenever the data in the Excel chart is changed, ensuring your information stays accurate and up-to-date.
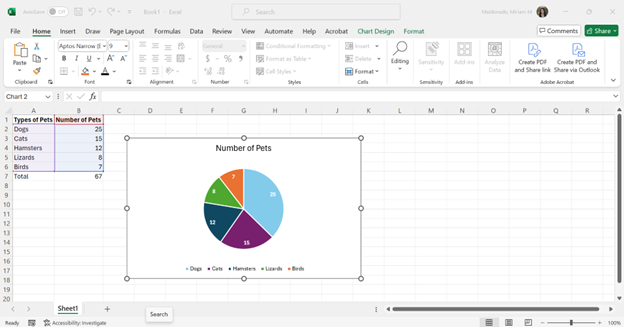
- Open Excel and select the chart you want to link.
- Copy the chart by right-clicking and selecting “Copy” or pressing Ctrl + C.
- Open PowerPoint and go to the slide where you want to insert the chart.
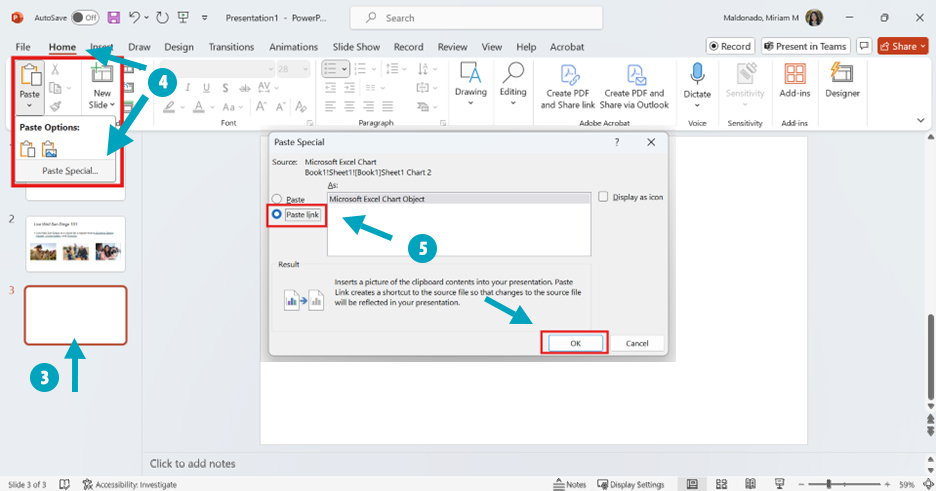
- Go to the “Home” tab and click on “Paste”, then “Paste Special”.
- Click on “Paste link” and then “OK”.
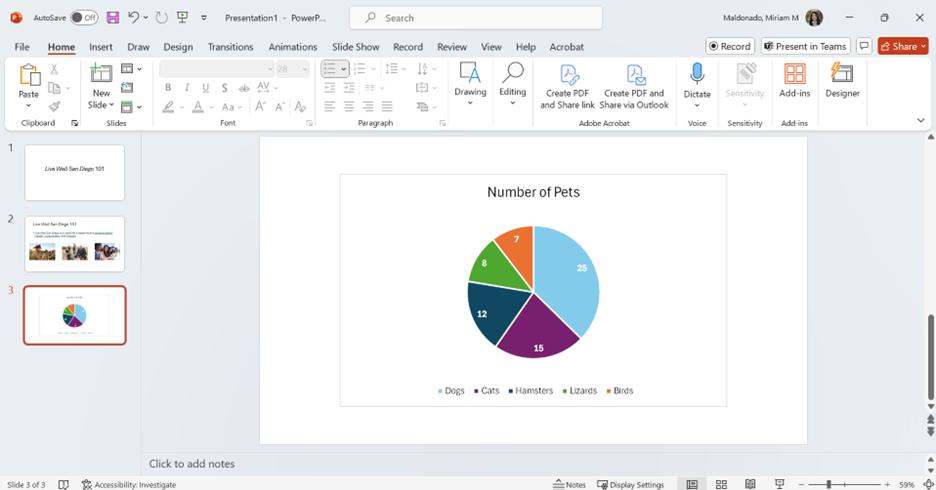
- The Excel chart will now appear in PowerPoint, and any updates made in Excel will automatically update in PowerPoint.
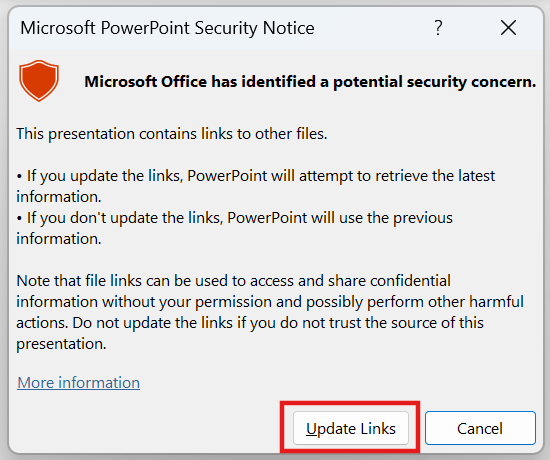
- Now every time you open the PowerPoint you will see a pop-up appear. To ensure that the slide with your linked data gets updated, click “Update Links”.
Additional resources to learn more about using PowerPoint tools:
- Microsoft PowerPoint Support (official site): PowerPoint help & learning (microsoft.com)
- PowerPoint Training on LinkedIn Learning (comprehensive course library): PowerPoint: Online Courses, Training and Tutorials | LinkedIn Learning
- PowerPoint Blog (tips and feature highlights): Microsoft 365 Insider Blog - Microsoft Community Hub
The resources offer a range of guides, from beginner to advanced level!
